Kicking off with “how to fix overexposed photos,” this topic is about regaining control over the light in your images. Overexposure can be a photographer’s worst nightmare, often resulting in lost details and a flat, uninteresting image. But don’t worry, with the right techniques and tools, you can rescue even the most overexposed photos and breathe new life into them.
Understanding the reasons behind overexposure is key to preventing it in the first place. From camera settings and lighting conditions to subject matter and genre-specific considerations, we’ll delve into the common causes of overexposure and explore how to avoid it in the future.
Assessing the Severity of Overexposure and Its Potential Impact on Image Quality
Overexposure can significantly impact the quality of an image, and its severity can vary from mild to extreme. Understanding the effects of overexposure is crucial for photographers to recover or correct the exposure before it results in a loss of details and information in highlights.
Assessing the severity of overexposure can be challenging, but a few visual cues can help identify it. The first sign of overexposure is a white or blown-out area in the image, typically in the highlights, which can occur when the camera’s sensor is overwhelmed by the intensity of light. At this stage, it’s essential to correct the exposure before it becomes too extreme. However, if the overexposure is more severe, the loss of detail in the highlights can be permanent, and recovery may become difficult, if not impossible.
Mild Overexposure
Mild overexposure can affect the overall brightness of the image but may not significantly impact the details. To correct mild overexposure, photographers can use software tools such as Adobe Lightroom or Photoshop to adjust the brightness and exposure of the image. This can be done using the ‘Exposure Adjustment’ tool, which allows for precise control over the overall brightness of the image.
Photographers can also use the ‘Histogram’ tool in the camera’s LCD or software to monitor the exposure. The histogram displays a graphical representation of the tones in the image, from dark to light. When the histogram is pushed to the right, it indicates overexposure, and when it’s pushed to the left, it indicates underexposure.
Extreme Overexposure
Extreme overexposure can result in the loss of detail and information in the highlights. This is due to the camera’s sensor being overwhelmed by the intensity of light, leading to a complete loss of data in the highlights. In such cases, recovery can be difficult and may require advanced image manipulation techniques.
To minimize the risk of extreme overexposure, photographers should monitor the camera’s histogram in real-time. The histogram can provide a quick assessment of the exposure, and if it’s pushed to the right, it’s essential to adjust the exposure compensation or use a graduated neutral density (ND) filter to prevent overexposure.
Recovering Details in Overexposed Highlights
Recovering details in overexposed highlights can be challenging, but some advanced techniques can help recover lost data. One technique is to use a high-pass filter, which highlights the edges and details in the image. This can help recover the lost details by emphasizing the edges and textures.
Another technique is to use a local adjustment tool, such as Adobe Lightroom’s ‘Local Adjustment Brush,’ which allows for precise control over the exposure and contrast of specific areas in the image. By using these tools, photographers can recover some of the lost details in overexposed highlights, although the results may not be perfect.
Monitoring the Histogram
Monitoring the histogram is essential when shooting in bright conditions. The histogram provides a graphical representation of the tones in the image, from dark to light. By monitoring the histogram, photographers can quickly assess the exposure and make adjustments in real-time.
Here are some key points to remember when monitoring the histogram:
* A histogram pushed to the left indicates underexposure, while one pushed to the right indicates overexposure.
* A histogram with a balanced distribution of tones indicates optimal exposure.
* A histogram with a steep slope indicates a loss of detail in the shadows or highlights.
Effective Workarounds to Rescue Overexposed Photos in Lightroom and Photoshop: How To Fix Overexposed Photos
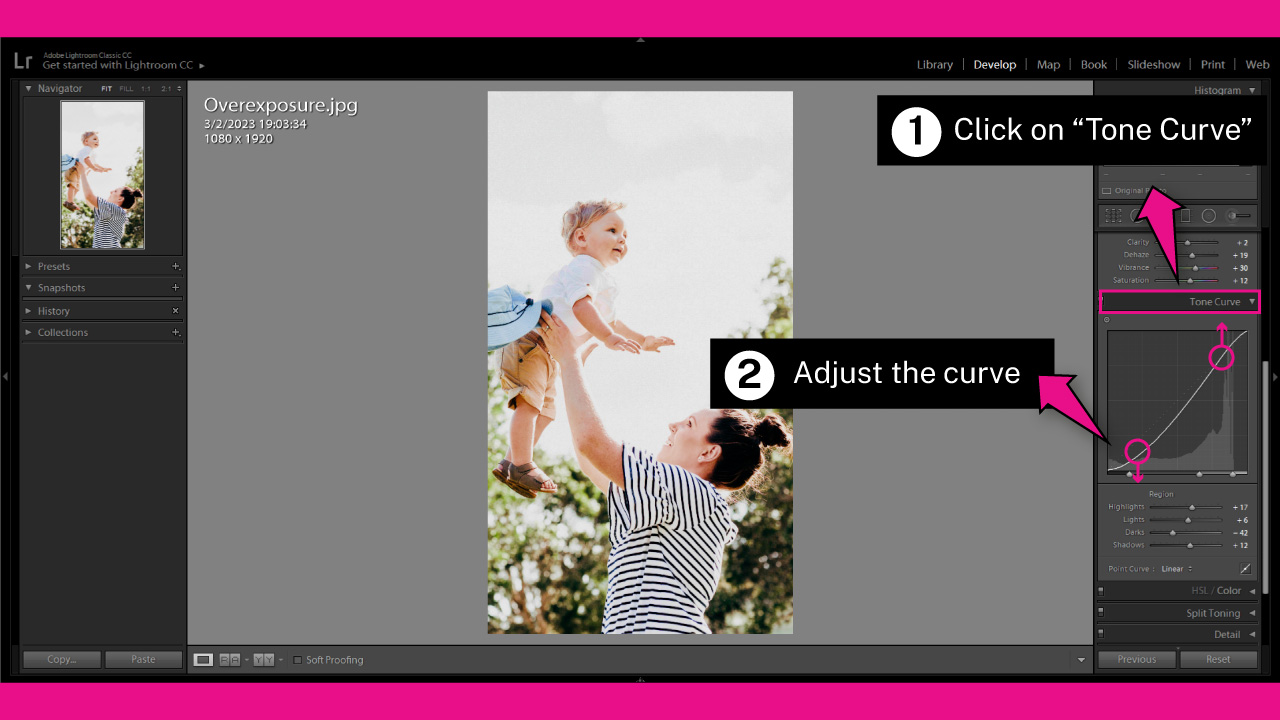
In this tutorial, we will demonstrate various techniques in both Lightroom and Photoshop to rescue overexposed images. These workarounds will focus on adjusting exposure, recovering details in shadows, and enhancing local contrast. By following these steps, you can significantly improve the overall quality of an overexposed photo.
Using the Exposure Slider
The Exposure slider is one of the most basic yet effective tools in both Lightroom and Photoshop. However, when dealing with overexposure, it’s essential to use this slider judiciously. To rescue an overexposed image using the Exposure slider, follow these steps:
- In Lightroom or Photoshop, navigate to the Adjustments panel and locate the Exposure slider.
- Sliding the Exposure slider left or right will adjust the overall brightness of the image. In the case of overexposure, you’ll want to slide it to the left to decrease the exposure.
- However, be cautious when adjusting the Exposure slider, as it can also affect the image’s contrast and details.
Local Adjustments in Lightroom and Photoshop
Local adjustments allow you to target specific areas of the image and apply adjustments without affecting the entire image. This is particularly useful when working with overexposed images, as you can recover details in the shadows and enhance local contrast.
- In Lightroom or Photoshop, use the Adjustment Brush or Graduated Filter tool to select the desired area of the image.
- Apply local adjustments by dragging or clicking on the slider to adjust the exposure, contrast, or other parameters.
- Repeat this process for multiple areas of the image, if necessary.
Using the Graduated Filter and Adjustment Brush Tools
The Graduated Filter and Adjustment Brush tools in Lightroom and Photoshop allow for precise control over local adjustments. You can use these tools to recover details in the shadows and adjust local contrast, resulting in a more balanced and visually appealing image.
- To use the Graduated Filter, select the tool and click on the area of the image you want to adjust. Drag the filter up or down to adjust the exposure and contrast.
- To use the Adjustment Brush, select the brush and paint over the area of the image you want to adjust. Adjust the exposure, contrast, or other parameters as needed.
| Tools | Description | Usage |
|---|---|---|
| Graduated Filter | This tool allows you to adjust the exposure and contrast in a specific area of the image. | Select the tool, click on the area, and drag up or down to adjust. |
| Adjustment Brush | This tool allows you to apply local adjustments to specific areas of the image. | Select the brush, paint over the area, and adjust the exposure, contrast, or other parameters. |
Advanced Techniques for Restoring Shadows and Details in Overexposed Images
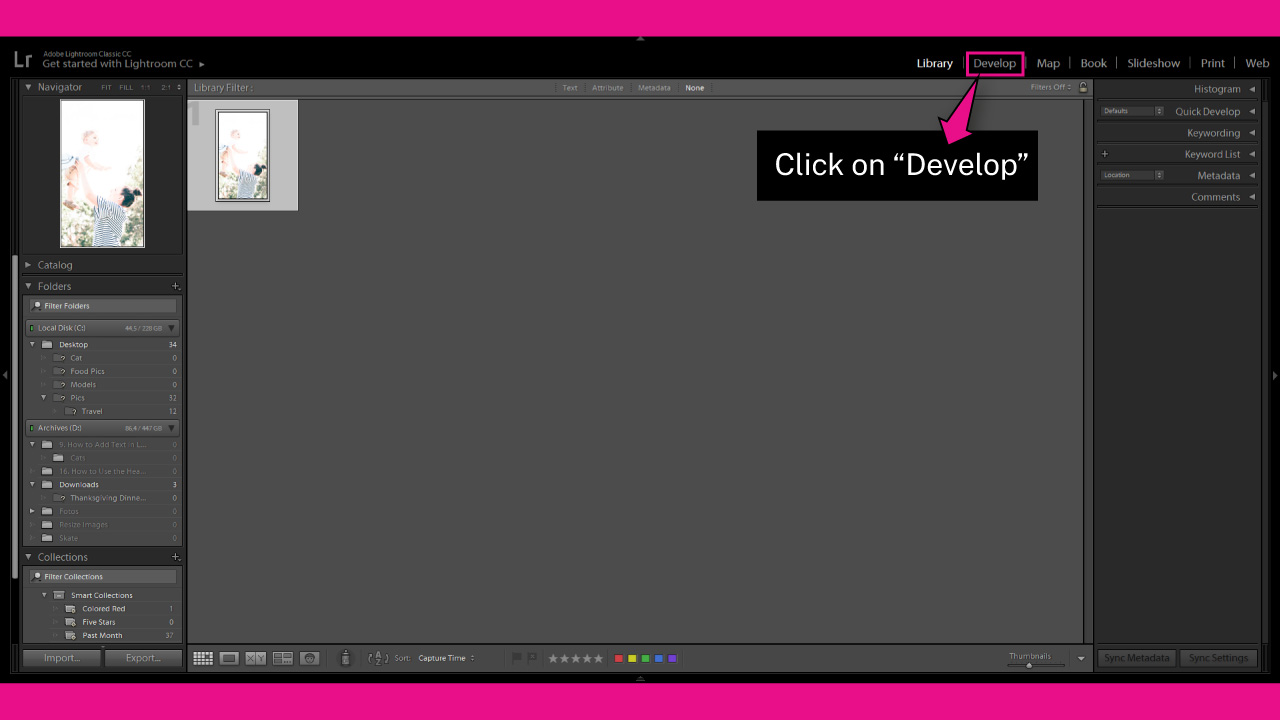
When dealing with overexposed images, advanced techniques can help restore shadows and details that were lost due to overexposure. By understanding the severity of overexposure and the potential impact on image quality, photographers can use advanced editing techniques to rescue these lost details. In this section, we will explore methods for identifying the extent of overexposure and assessing the potential for image recovery, as well as tips on how to use frequency separation and layer masking to restore shadows and details in an overexposed image.
Identifying the Extent of Overexposure
To restore shadows and details in an overexposed image, it’s essential to understand the extent of overexposure. This can be done using various tools and techniques, including:
- Exposure Compensation: This tool allows you to adjust the exposure of the image by adjusting the amount of light that entered the camera’s sensor. By analyzing the histogram, you can identify areas of the image that are overexposed.
- Highlight Priority: This mode allows you to adjust the exposure to prioritize highlights over shadows. It’s essential to use this mode to prevent blowing out the highlights.
- Split-Toning: This technique involves adjusting the tone curves to separate the shadows and highlights of the image. By doing so, you can restore lost details in the shadows and highlights.
- Zone System: This technique involves dividing the image into zones, each with its own exposure value. By adjusting the exposure value of each zone, you can restore lost details in the shadows and highlights.
Assessing the Potential for Image Recovery
Once you have identified the extent of overexposure, it’s essential to assess the potential for image recovery. This can be done using various tools and techniques, including:
- Image Histogram: This tool allows you to analyze the histogram of the image to identify areas of the image that are overexposed.
- Shadow/Highlight Tool: This tool allows you to adjust the shadows and highlights of the image to restore lost details.
- Clone Stamp Tool: This tool allows you to clone areas of the image that are not overexposed to replace areas that are overexposed.
- Shadow Recovery Techniques: This technique involves using various tools and techniques to recover lost shadows in the image.
Frequency Separation and Layer Masking
Frequency separation and layer masking are advanced techniques that can help restore shadows and details in an overexposed image. By using these techniques, you can isolate the areas of the image that are overexposed and adjust the exposure of those areas separately from the rest of the image.
- Frequency Separation: This technique involves separating the image into two components: a high-frequency component and a low-frequency component. The high-frequency component contains the details of the image, while the low-frequency component contains the overall tone of the image.
- Layer Masking: This technique involves creating a mask for the image, which allows you to select specific areas of the image to expose or hide. By using layer masking, you can isolate the areas of the image that are overexposed and adjust the exposure of those areas separately from the rest of the image.
Creating a Detailed Adjustment Plan, How to fix overexposed photos
To rescue an overexposed image, it’s essential to create a detailed adjustment plan. This plan should include the following steps:
- Analyze the image: Take a close look at the image to identify areas of overexposure and assess the potential for image recovery.
- Adjust exposure compensation: Adjust the exposure compensation to prioritize highlights over shadows.
- Use split-toning and zone system: Use split-toning and zone system to separate the shadows and highlights of the image and restore lost details.
- Use frequency separation and layer masking: Use frequency separation and layer masking to isolate areas of the image that are overexposed and adjust the exposure of those areas separately from the rest of the image.
- Use image recovery techniques: Use image recovery techniques, such as shadow recovery techniques, to restore lost shadows in the image.
Summary

In conclusion, fixing overexposed photos is a skill that can be mastered with practice and patience. By learning how to prevent overexposure, you’ll be well on your way to taking stunning images that tell a story. Whether you’re a beginner or a seasoned pro, these techniques and tools will help you rescue even the most overexposed images and take your photography to the next level.
So, don’t let overexposure hold you back any longer. With the right knowledge and tools, you can unlock the full potential of your images and achieve the results you’ve always wanted.
FAQ Summary
Can I fix overexposed photos in-camera?
Yes, in some cases. Many modern cameras have features like exposure compensation, HDR, and bracketing that can help you capture properly exposed images even in challenging lighting conditions.
How do I know if my photos are overexposed?
Check your camera’s histogram to determine if you’ve blown out the highlights. If the graph is peaking on the right side, your image is likely overexposed.
Can I recover details in blown-out shadows?
Yes, with the right tools and techniques, you can often recover details in blown-out shadows, but the effectiveness of this depends on the severity of the overexposure.
Is there a way to prevent overexposure in portrait photography?
Yes, by using a reflector or an external light source, you can create a more balanced lighting setup and avoid overexposing your subject’s face and hair.

